· 11 min read
How I Added an EmailOctopus Newsletter to My Astro Blog
A step-by-step walkthrough of integrating EmailOctopus into an AstroWind blog, styling a third-party injected form, handling view transitions, and staying GDPR compliant without a cookie banner.
Hi friends,
In my last post after setting up analytics, only to find out that nobody is reading my blog, I decided to create a mailing list. I thought, if I am going to shout into the void, I might as well have a mailing list.
Well friend, I am very happy to inform you that the mailing list is operational and located in the footer of this site. Go sign up!
Now that you are a member of this very exclusive club, let’s see how I setup everything for free and what I would have done differently.
TL;DR: I setup EmailOctopus and embedded their form into this site. Then injected css to make it fit and respond to theme changes. Jump to Creating the Component if you want to skip straight to the implementation.
Selecting an Email Service
Starting this project I had a few requirements:
- Free newsletter service for a small list.
- GDPR compliant without the need of cookies.
- Easy to integrate with my site.
Doing a quick search I settled on two options: EmailOctopus and Kit. Both are third-party email marketing services. They help manage subscriber lists and send campaigns through their platform, and they handle the infrastructure.
Both of them satisfied my requirements but EmailOctopus had a more generous 2,500 subscribers limit in their free tier. Let’s be honest, I am not surpassing this limit any time soon.
How the Integration Works
One really cool feature those platforms have is the ability to generate signup forms through their interface. Each signup form generates a <script> tag which I can drop into HTML code and call it a day; friends can sign up to the mailing list.
In reality I am far from done because I care how the signup form renders. You see EmailOctopus has no idea about my css code, how I handle themes etc. They also seem to hate customization options and they force me to pick between a few nice looking but very generic options, nothing that fits nicely in my Astro site. I thought I should reach out and complain but then I remembered I am not a paying customer so I just found a workaround.
Making a Nice Looking Form
To fix the customization issues there are two main options:
- Either write the form myself and have a serverless function that calls the EmailOctopus API, sending information every time someone requests to sign up.
- Try to hijack the CSS EmailOctopus ships to make it render to my liking.
The second option is not great because as soon as EmailOctopus changes their forms, my form will break. I have no control over their forms, nor will they let me know about changes in advance (maybe they have an email list I can subscribe to, not sure).
Guess which option I picked. That’s right, in this blog post I explain how to hijack CSS code to customize EmailOctopus premade signup forms. Buckle up.
Setup
Account creation and domain verification
Signing up is straightforward. The one thing worth knowing upfront: EmailOctopus will ask me to verify my domain by adding DNS records in Cloudflare. To do the verification EmailOctopus gave me a TXT record for domain ownership and a couple of CNAMEs for DKIM signing.
I am using Cloudflare, so I went to the DNS settings for my domain in Cloudflare, and added all my records.
The gotcha: set all CNAMEs to DNS only (grey cloud) in Cloudflare, not proxied. Cloudflare’s proxy intercepts traffic before it reaches the destination, which breaks the CNAME verification lookup. Email authentication records should never be proxied.
Form Creation
Ah yes, the pre-made form UI located under Grow -> Forms.
From there, I press create and select a basic form. After wasting a few minutes customizing my form I realised there is no way I could match my theme and pressed save. Remember, I am changing everything in CSS. (except the EmailOctopus logo, I need to give those guys some credit.)
Two very important settings to configure from the Form Settings tab are:
- Enable the option “Include Consent Box”.
- Disable the option “Include a hidden Google reCAPTCHA and protect against bots”.
Both settings have to do with GDPR. The first just forces fellow Europeans to agree to have their emails saved just to be on the list (totally worth it by the way). The second removes Google reCAPTCHA bot protections, which not only protects the mailing list from bot subscribers but also tracks users and requires user consent via cookie banners.
Enable Double Opt-In Emails
You know me, I am all about cookie-banner-free experiences but in this case, disabling reCAPTCHA also means bots can fill up your 2,500 member free tier mailing list with fake emails.
To fight bots, I just enabled double opt in emails which sends a verification email to subscribers asking them to verify they are not bots. Most of the time the email bots use to signup is fake so the opt in email will bounce.
To enable this option I navigated to Contacts -> Consent and Customization -> Double opt-in email.
With the account configured and the form created, I had everything I needed from the EmailOctopus side. Time to wire it into the site.
Implementation
I followed a similar pattern to my Umami post, baking the integration into AstroWind’s vendor system so the form ID and script URL live in config rather than hardcoded in a component.
1. Extending the Config System
AstroWind exposes a virtual module called astrowind:config that any component can import. Config values flow from src/config.yaml through configBuilder.ts and get bundled at build time.
I added a newsletter block to configBuilder.ts:
// vendor/integration/utils/configBuilder.ts

export interface NewsletterConfig {
  vendors: {
    mailOctopus: {
      src?: string;
      dataForm?: string;
    };
  };
}

const getNewsletter = (config: Config): NewsletterConfig => {
  const _default = {
    vendors: { mailOctopus: { src: undefined, dataForm: undefined } },
  };
  return merge(_default, config?.newsletter);
};
Then exported it from types.d.ts and included it in the virtual module string in index.ts. The Umami post covers this pattern in more detail.
2. Adding Values to config.yaml
EmailOctopus gives you a script tag when you create a form. The src URL and data-form attribute are the two values you need:
# src/config.yaml
newsletter:
  vendors:
    mailOctopus:
      src: https://eomail5.com/form/your-form-id.js
      dataForm: your-form-id
To disable the form entirely, I can just set either value to null. The component returns early if either is missing.
3. Creating the Component
This is where it gets both interesting and frustrating. You see, EmailOctopus doesn’t give you a plain HTML form to drop in. It gives you a <script> tag that, when loaded, injects its own HTML, CSS, and a second script into the page. You have no direct control over any of it.
Creating a simple component
At this point we are just loading the configuration settings we setup so far, create a container and wrap the script EmailOctopus provided. The idea is that when the script runs, it will start adding elements under the container.
---
import { NEWSLETTER } from 'astrowind:config';
const { src, dataForm } = NEWSLETTER.vendors.mailOctopus;
if (!src || !dataForm) return;
---
<div class="mo-signup">
<script src={src} data-form={dataForm} async is:inline></script>
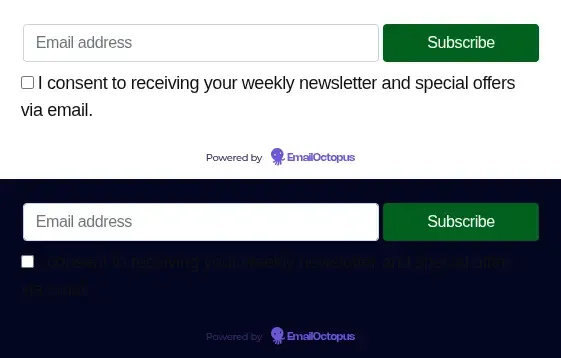
</div>This worked however I was not very impressed with the look. On my light theme, the form was looking very similar to EmailOctopus form creator, however when switching to my dark theme, everything was off. Also fellow Europeans wouldn’t be able to read the consent message clearly. We are talking about disaster here.
Making the form survive navigation
I was planning to sort out CSS but then started navigating the site and saw that the email form is not rendered on all pages.
This really confused me. After I spent some time debugging, I found out that the EmailOctopus script injects the form HTML into the page, then removes itself from the DOM — it assumes a traditional website where every navigation triggers a full page reload. Astro’s view transitions break this assumption: instead of a full reload, Astro swaps DOM elements between pages. When navigating, Astro replaces the container with a fresh copy from the new page’s HTML — but the browser won’t re-execute a script it has already loaded, so the form never re-injects. The fix is transition:persist, which tells Astro to leave the container untouched during navigation. The form is injected once on first load and stays there forever.
<div class="mo-signup" transition:persist>
  <script src={src} data-form={dataForm} async is:inline></script>
</div>
Now the form is surviving basic site navigation, it just looks ugly. Good progress.
Injecting theme CSS
So following my initial plan, I used DevTools to inspect elements and see what CSS values I should change. I managed to change all colors and match them with my theme.
<style is:global>
  /* is:global required — EmailOctopus injects its HTML after build so scoped styles won't match */

  /* Map EmailOctopus colour variables to blog design tokens, auto-switches with theme */
  .mo-signup [data-form] .emailoctopus-form {
    --text-colour: var(--aw-color-text-default);
    --label-colour: var(--aw-color-text-muted);
    --field-colour: var(--aw-color-bg-page);
    --eo-form-placeholder: var(--aw-color-text-muted);
  }

  /* Fix input text colour in dark mode — EmailOctopus doesn't set this, browser default is dark */
  html .mo-signup input:not([type='submit']) {
    color: var(--aw-color-text-default) !important;
  }

  /* Override EmailOctopus button styles to match blog theme */
  html .mo-signup input[type='submit'] {
    background-color: var(--aw-color-primary) !important;
    border-color: var(--aw-color-primary) !important;
    color: #ffffff !important;
    border-radius: 9999px !important;
  }
  html .mo-signup input[type='submit']:hover {
    background-color: var(--aw-color-secondary) !important;
    border-color: var(--aw-color-secondary) !important;
  }
</style>
Now the form looks nice and follows the theme.
Improving the layout
With the colors matching the theme, the final thing I wanted to do was to improve the layout. I am a big fan of how the form renders on mobile where the button is under the text-field. So I did the same for desktop and tablet sizes. Modifying the layout was a few more CSS overwrites.
The complete component is:
---
import { NEWSLETTER } from 'astrowind:config';
const { src, dataForm } = NEWSLETTER.vendors.mailOctopus;
if (!src || !dataForm) return;
---
<div class="mo-signup max-w-[360px]" transition:persist>
<script src={src} data-form={dataForm} async is:inline></script>
</div>
<style is:global>
/* is:global required — EmailOctopus injects its HTML after build so scoped styles won't match */
/* Map EmailOctopus colour variables to blog design tokens, auto-switches with theme */
.mo-signup [data-form] .emailoctopus-form {
--text-colour: var(--aw-color-text-default);
--label-colour: var(--aw-color-text-muted);
--field-colour: var(--aw-color-bg-page);
--eo-form-placeholder: var(--aw-color-text-muted);
}
/* Fix input text colour in dark mode — EmailOctopus doesn't set this, browser default is dark */
html .mo-signup input:not([type='submit']) {
color: var(--aw-color-text-default) !important;
}
/* Override injected fixed widths — checkbox excluded to keep consent row intact */
html .mo-signup *:not(input[type='checkbox']) {
width: 100% !important;
max-width: 100% !important;
}
/* Remove injected padding and margins from form root elements */
html .mo-signup [data-form],
html .mo-signup .form-container {
padding: 0 !important;
margin-inline: 0 !important;
}
/* Stack input and button vertically — injected default is a flex row */
html .mo-signup .main-form {
flex-direction: column !important;
}
/* Override EmailOctopus button styles to match blog theme */
html .mo-signup input[type='submit'] {
background-color: var(--aw-color-primary) !important;
border-color: var(--aw-color-primary) !important;
color: #ffffff !important;
border-radius: 9999px !important;
}
html .mo-signup input[type='submit']:hover {
background-color: var(--aw-color-secondary) !important;
border-color: var(--aw-color-secondary) !important;
}
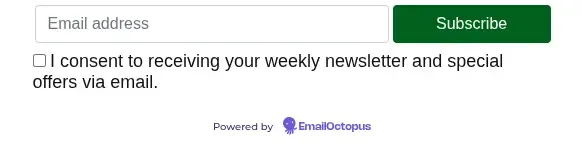
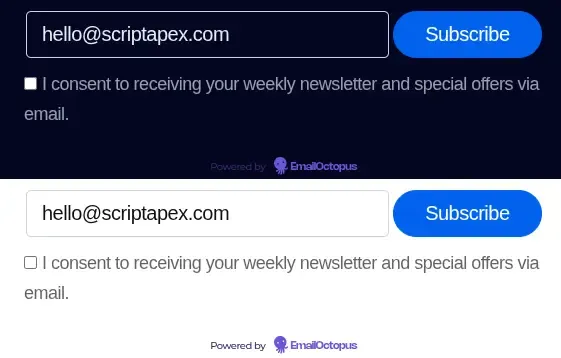
</style>The final form looks great, fresh and ready at the footer for you friends to go and subscribe. Here is proof this method works in case EmailOctopus breaks things.

Time for a retro
If I did this again I would build my own form instead of using the EmailOctopus script and trying to alter their CSS. While the approach in this post concentrates all the form manipulation complexity in a single component, the component will break as soon as EmailOctopus decides to change their CSS class names. The alternative is straightforward in principle: build a plain HTML form, and on submit, call the EmailOctopus API from a Netlify serverless function to add the subscriber. You own the markup, the styles, and the behaviour — EmailOctopus just stores the contact.
To be fair, using the EmailOctopus form and adjusting the CSS has some benefits. I didn’t have to spin up a serverless function and the complexity of the setup is all within a component. Retrospectively, this is not reason enough.
What’s Next
As you know the newsletter is live. If you want to follow along as I explore and make stuff, subscribe below. I promise not to spam you — double opt-in is enabled so you will get a confirmation email first anyway.
For now the blog is in a good place and I am done building it for a while. Next time I will be writing about something more interesting — stay tuned.